Overview
A quick article on installing the C/C++ Extension Pack in VS Code as well as installing the MinGW in Windows which includes the GCC compiler.
Configure VS Code
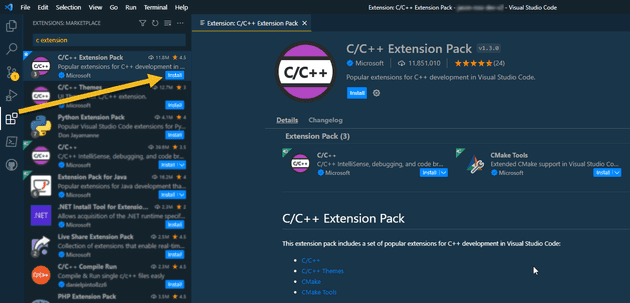
Download and install the C/C++ Extension Pack in Visual Studio Code
- Open VS Code
- Click Extensions
- Search for ‘c extension’
- Click Install next to C/C++ Extension Pack
Download the Compiler
- Browse to https://nuwen.net/mingw.html
- Download the Windows Mingw-w64 executable
- Double-click mingw-XX.X.exe to start the extraction
- I am going to extract to my C drive
C:\ - This will create a folder called
MinGWon your C drive
Set the MinGW Environment Variable
- Go to the MinGW bin folder and copy the path. Mine looks like this:
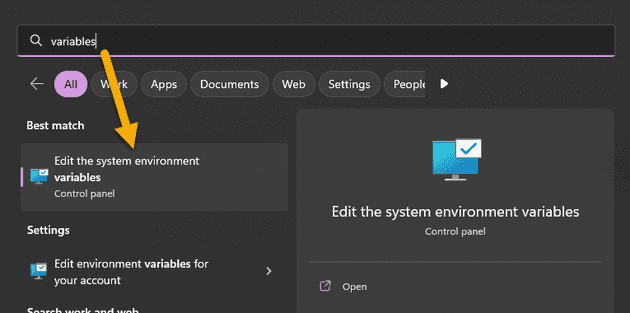
C:\MinGW\bin - On Windows 11, click the Start Button and search for variables
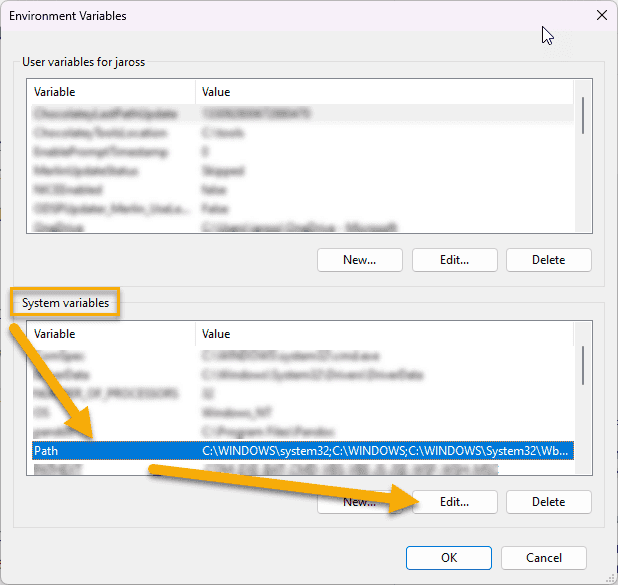
- Click the Environment Variables… button
- Under System Variables, select path, and click on Edit…
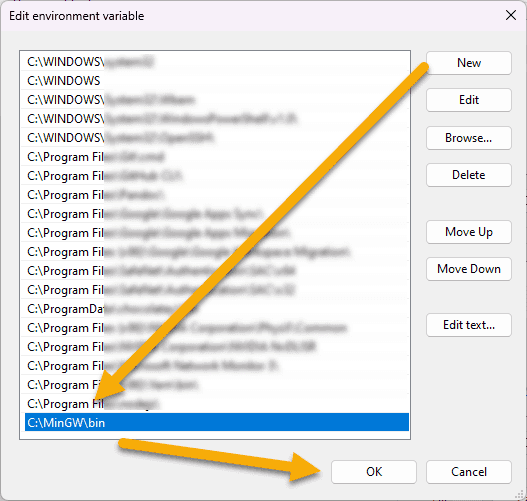
- Click on the New button and type our MinGW bin path:
C:\MinGW\bin
- Click OK to save changes and close out of the other dialog boxe(s)
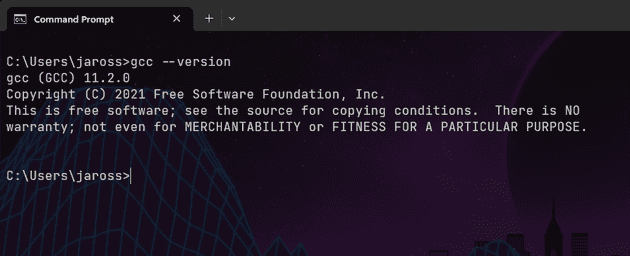
- Confirm that the environment variable has been successfully added by opening a new Command Prompt and type
gcc --versionand you should get output
- Restart VS Code if it was open during the install of MinGW and modifying the system environment variables.
Compile your C program in VS Code
- Copy and Paste the following code into a file called
hello.c
#include <stdio.h>

int main(void)
{
    printf("Hello, World!\n");
    return 0;
}- Save the file
- Click the Run arrow button in the top right corner
- Select gcc.exe which should be located in our MinGW\bin location:
- In the Terminal output, you will see Hello, World!
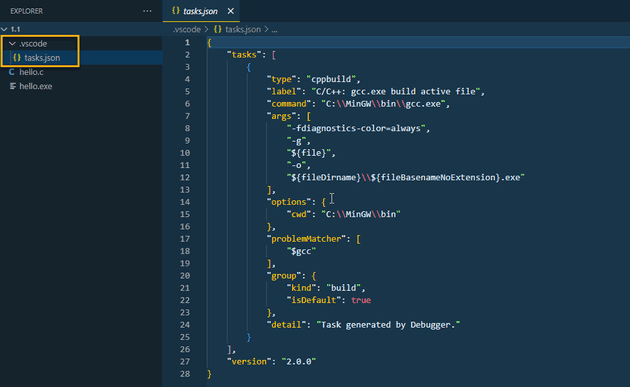
You will also notice that you will see a folder get created in the same directly called .vscode that contains a file called tasks.json. This file contains the settings for our compiler:
That is all and happy coding!
